Burn Music to CD via Windows Media Player or iTunes, so that you can create mix CDs of your favorite music.
Nowadays, as technology progressed changed, the CD was superseded by the digital video disc (DVD) and then the Blu-ray disc. Nevertheless, it remains an important option for millions of people to free up space for the new songs without losing the old ones, and to make all favorite songs in one place rather than having to switch between separate albums, or to take your music on the road, ect. It's a lot of fun to create your own custom music CDs. All you need is Windows Media Player or iTunes and a computer with a CD burner. If you are not yet familiar with the methods on how to burn your music to a CD, this guide will provide an all-around solution for you by introducing the 2 top popular ways of burning music onto CD with ease.
Related Article: Burn Spotify Playlists to CD on Windows/Mac | Burn Amazon Music to CD
Windows Media Player allows computers with built-in CD and/or DVD burners to create and copy audio CDs for playback in car stereos and other CD players incredibly simple. Here is the steps:
Step 1: Insert a blank CD or DVD into your CD/ DVD drive. Make sure the drive is either CD-RW or DVD-RW. The 'W' stands for writeable, and is necessary to burn information to the disc.
Step 2: Open Windows Media Player and click on the "Burn" tab located in the right pane. An empty burn list shall be displayed.
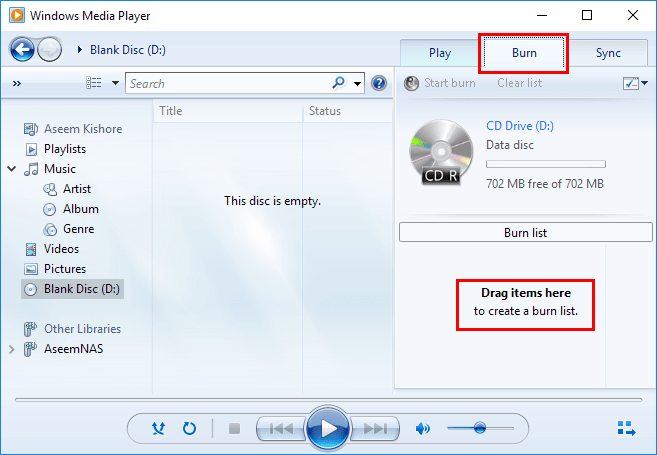
Step 3: Find the files you want to burn from your Library (Music, Videos, and Pictures) and drag them to the burn list.
Step 4: Click "Start burn". When the burn is complete, your disc will be ejected automatically.
Tips: These full-sized (12cm) recordable discs can be used: CD-R, CD-RW, DVD+R, DVD+R DL, DVD+RW, DVD-R, DVD-RW.
Apart from Windows Media Player, iTunes is also a great too to copy music from computer to CD.
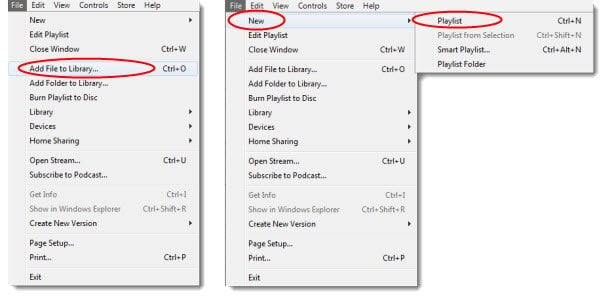
Step 1: Launch iTunes and create your playlist. Go to File > New > Playlist, enter a name for the playlist, then drag and drop the desired songs into it.
Note: Please make sure all the songs in the playlist are authorized for this computer. Songs purchased from the iTunes store are linked to your iTunes account. Double-click each song to make sure it plays.
Step 2: Insert a blank CD into your computer. And then select the playlist you want to burn in iTunes, and right click the playlist. In the drop down list, select "Burn Playlist to Disk". Then, there will a window pops up to allow you selecting a disc format.
Please also check playlist size to make sure it doesn't exceed the amount of space on a CD.
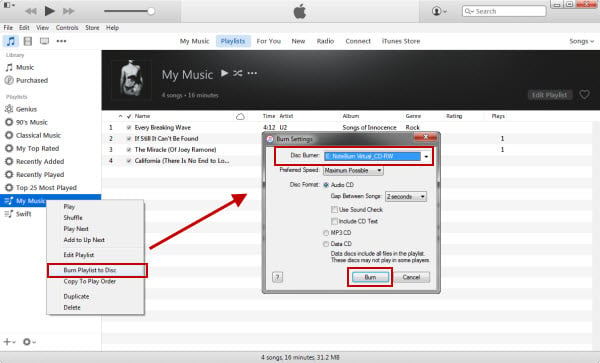
Step 3: Click the "Burn" button to begin copying the songs from your computer to the CD. You can watch the progress in the iTunes window.
Step 4: When the files are copied successfully, a CD icon will appear in the iTunes Source list. Then please reject the CD from computer.
If you are trying to burn music to CD in iTunes or burn iTunes music to CD, go ahead, it is easy to do that within iTunes. Although Apple allows subscribers freely download and save the music and albums offline onto supported devices for playback, it restricts the use of the music files on other devices by adding technical encoded protection. For example, prevent users from burning Apple Music to CD. So if you want to burn Apple Music songs onto a CD for streaming in your car, first and foremost is to record Apple Music songs.
Here we meet NoteBurner Apple Music Converter, a smart Apple Music to MP3 converter, which supports to record Apple Music songs and convert Apple audiobooks, or iTunes M4P music to MP3, FLAC, AAC, AIFF, WAV, or ALAC format. Moreover, it is capable of converting any Apple Music files at 10X faster speeds with keeping lossless audio quality.

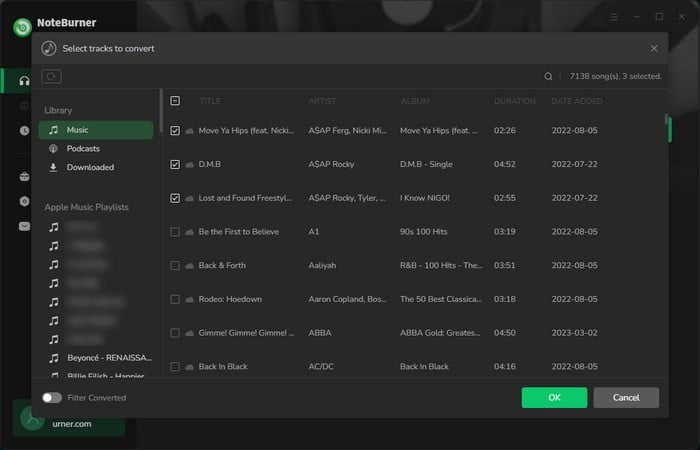
Launch NoteBurner Apple Music Converter and select "iTunes App" download mode. Click the button "+ Add" to add music, it will pop up a window, which will show you all of the songs you have downloaded from Apple Music. Or you can also directly drag & drop the downloaded Apple Music files to NoteBurner.
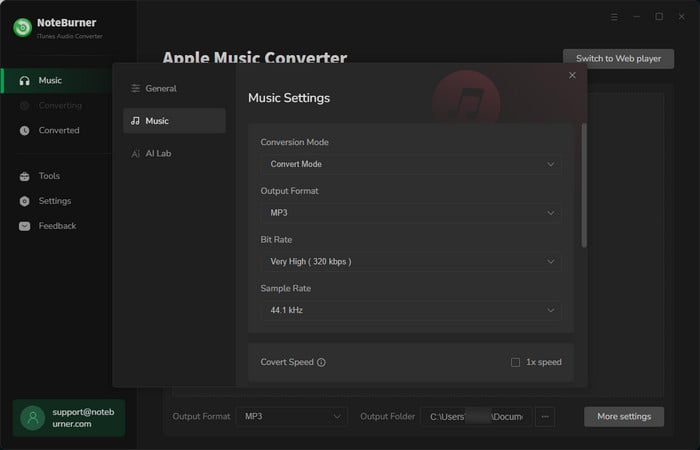
After the successful adding, please click the button "Settings" to choose the output format as you need, in the pop-up window, you can set output path, output quality, and output format including WAV, AAC, MP3, AIFF, FLAC, and ALAC.
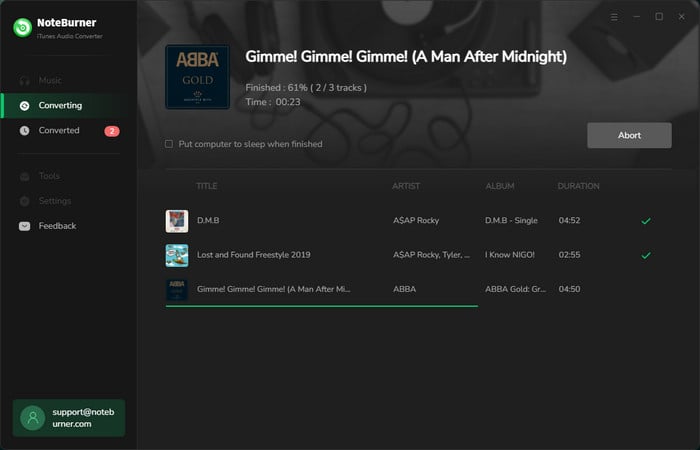
After completing the above steps, the final one is clicking the button "Convert". Just a few second, it will succeed. After conversion, click the "History" button as the right side to find the output audio. And then you can use Windows Media Player to burn the converted Apple Music songs to CD or add them to iTunes for burning.
For more detailed steps, please refer to How to Burn Apple Music Songs to CD
 What's next? Download NoteBurner iTunes Audio Converter now!

One-stop music converter for Spotify, Apple Music, Amazon Music, Tidal, YouTube Music, etc.
Convert Spotify music songs, playlists, or podcasts to MP3, AAC, WAV, AIFF, FLAC, and ALAC format.
Convert Amazon Music to MP3, AAC, WAV, AIFF, FLAC, and ALAC with up to Ultra HD quality kept.
Convert Tidal Music songs at 10X faster speed with up to HiFi & Master Quality Kept.
Convert YouTube Music to MP3, AAC, WAV, AIFF, FLAC, and ALAC at up to 10X speed.

Convert Deezer HiFi Music to MP3, AAC, WAV, AIFF, FLAC, and ALAC at 10X faster speed.
Transfer playlist between Spotify, Apple Music, Amazon Music, YouTube Music, and more.