
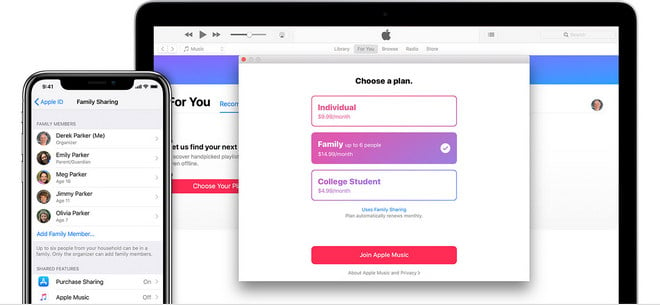
If you are using Apple Music, you should know that Apple Music mainly offers three plans for users to stream over 100 million songs, including student plan for $5.99 per month, individual plan for $10.99 per month, and family plan for $16.99 per month. In general, most people choose an individual plan. But if you have at least one family member that uses the service, there's a good chance that you and your family might be able to save a few bucks by opting for a family account instead of separate accounts.
With a family subscription to Apple Music, up to six family members get unlimited access to the entire Apple Music catalog, music recommendations tailored to their personal music tastes, and access to their own iCloud Music Library.
Apple Music is far from the only service to offer family subscriptions, but its plan is hooked into iOS and OS X's Family Sharing feature. So the process could be a little tricky if you are trying to add family members to your Apple Music subscription. Don't worry, though, here you will learn the complete steps of this process.
To use Apple Music Family plan, an Apple Music Family plan is required. In addition, you need to set up Family Sharing feature to start a family group. However, Family Sharing is a feature introduced with Apple's latest operating systems. So you are required to have an iOS device with iOS 8 and later, or a Mac with OS X Yosemite and later.
Family Sharing requires one person to be the Organizer, providing a single point of contact associated with the credit card on file. That person also manages parental restrictions and sets everyone else up with the service.
Note: You can be a part of only one family at a time.
The easiest way to set up Family Sharing is on an iPad or iPhone. Here are the detailed steps:
Step 1: Open up the Settings of application from your Home Display, Scroll to the iCloud subsection, Click Set Up Family Sharing, then tap Get Started.
Step 2: Confirm your decision to become the family organizer, and ensure that you're signed in with your personal Apple ID.

Step 3: Tap "Family Sharing" again and select "Add Family Member". You can choose to notify him or her by email or message.
Step 4: Enter your family member's name or email address and tap "OK". Your family member will receive an email with instructions on how to join the combined group.

To check if the family member accepts the invitation, you can tap "Family Sharing" to see it. If you want Family Sharing to share Apple Music subscription only, make sure to disable other sharing option under Family Sharing.
As the organizer, you can easily tap Family Sharing and select any user to remove from your Family plan. If you mistakenly remove someone from Family Sharing, just repeat this method to add people to Apple Music family group.
As we all know, Apple encrypts all the tracks in Apple Music with DRM limit, so even the subscriber can only enjoy Apple Music on some selected devices. And worse yet, all the access to downloaded Apple Music will be lost if you unsubscribe the service. Luckily, things changed thanks to the coming out of a magic Apple Music Converter, NoteBurner iTunes Audio Converter. It's an all-in-one smart Apple Music downloader and converter specially designed for Apple users to completely record Apple Music, and convert them to plain formats, like MP3, AAC, WAV, AIFF, FLAC, or ALAC format. With the help of this smart tool, you can easily get DRM-free Apple Music songs and save them on your devices forever.
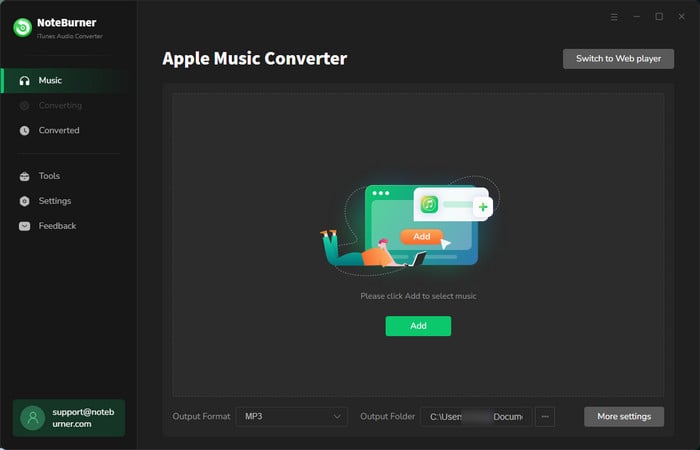
Step 1 Download NoteBurner iTunes Audio Converter

Step 2 Choose "iTunes App" as the download mode and click the button "+Add" to add music, it will pop up a window, which will show you all of the songs you have downloaded from iTunes. You can choose any song you want to convert.
Step 3 After the successful adding, please click the button "Settings" to choose the output format as you need, in the pop-up window, you can set output path, output quality, and output format including MP3, AAC, FLAC, AIFF, WAV, and ALAC.
Step 4After completing the above steps, the final one is clicking the button "Convert". Just a few seconds, it will succeed.
Once the conversion finishes, the DRM will be removed completely from Apple Music, you can save and enjoy them anywhere anytime.


