
Have you ever been vibing to your playlist, only to be jarred out of it by the awkward silence that follows when one song ends and the next begins? Wouldn't it be great if your playlist transitions were as smooth as a DJ's mix? That’s exactly what the Apple music crossfade feature is for.
This guide will not only show you how to crossfade on Apple Music in a few simple steps, but also reveal a powerful trick that allows you to enjoy seamless transitions on any device, in any scenario.

Simply put, Apple music crossfade is a playback setting that makes your music sound like it flows seamlessly. Instead of one song ending completely before the next one starts, the end of the first track overlaps with the beginning of the next one for a short time. Think about how DJs mix tracks—crossfade gives you a similar effect.

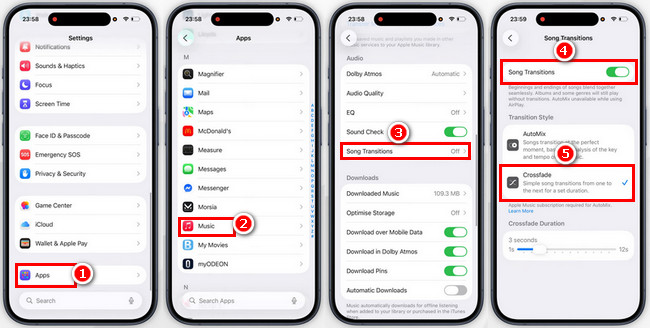
Step 1Go to Settings on your phone.
Step 2Tap "Apps" > Music > "Song Transitions".
Step 3Turn "Song Transitions" on and select "Crossfade". (You will see a slider. Drag the slider to set your preferred crossfade duration, between 1 and 12 seconds. Moving the slider automatically enables the feature.)
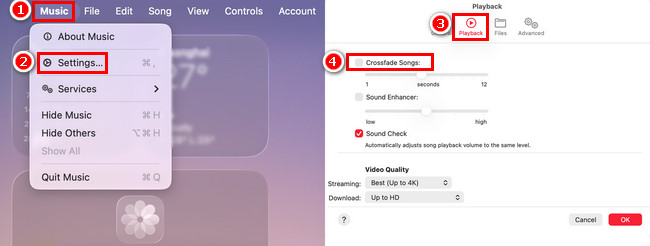
Step 1Launch the Apple Music app on your Mac.
Step 2In the menu bar (top-left corner of the screen), click "Music" > "Settings".
Step 3Click "Playback" > "Song Transitions". (You will see a slider. Drag the slider to set your preferred crossfade duration, between 1 and 12 seconds. Moving the slider automatically enables the feature.)
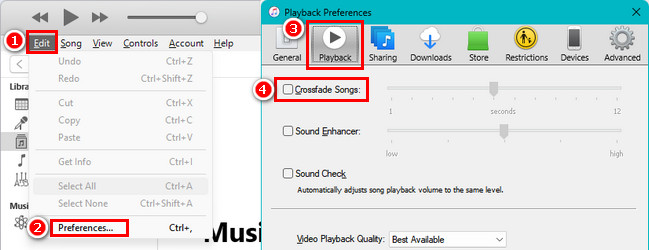
Step 1Launch the iTunes app on your PC.
Step 2Click "Edit" (top-left corner of the iTunes) > "Preference".
Step 3Click "Playback" > "Crossfade Songs". (You will see a slider. Drag the slider to set your preferred crossfade duration, between 1 and 12 seconds. Moving the slider automatically enables the feature.)
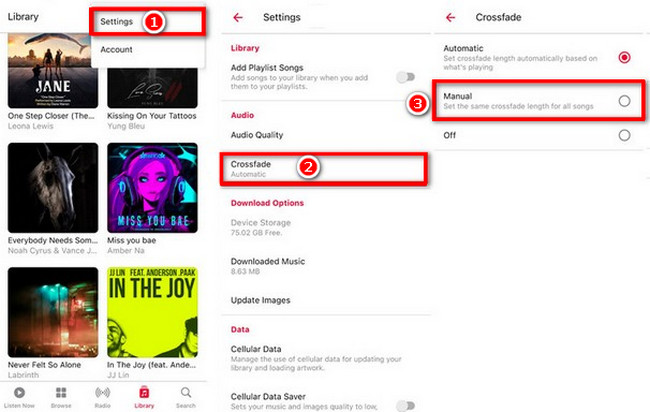
Step 1Launch the Apple Music app on your Android device.
Step 2Tap the three-dot at the top-right corner of the screen, and select "Settings".
Step 3Scroll down to the Audio section, tap "Crossfade" > "Manual". (You will see a slider. Drag the slider to set your preferred crossfade duration, between 1 and 12 seconds. Moving the slider automatically enables the feature.)
While Crossfade can make your playlists sound smoother, it’s far from perfect. In fact, Apple Music Crossfade isn’t available in every situation:
These limitations can be frustrating. So it is best to download your Apple Music tracks in common formats such as MP3. This enables you to import songs into any Crossfade-compatible player, free from the constraints of Apple Music's built-in system. NoteBurner Apple Music Converter is a top-rated Apple Music playlist downloader. It lets you effortlessly convert Apple Music tracks to MP3 (and other formats) while preserving the original quality and ID3 tags. Once the conversion is complete, you can set up seamless crossfade transitions using any music player, providing a smoother and more flexible listening experience, regardless of the device or app you use.

Step 1Install and launch NoteBurner Apple Music Converter and select "Apple Music web player".

Step 2 Select a playlist you like on the Apple Music web player, and click the "Add" icon.

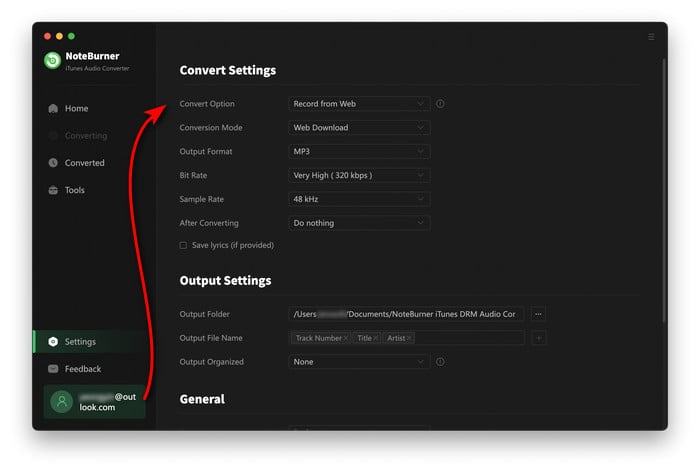
Step 3 Click on the "Settings" button to choose output format (MP3), bit rate, etc.
Step 4 Click the "Convert" button to start converting Apple Music to MP3. Once the conversion is complete, click the "History" section. Hover over any song with your mouse, then click the "Folder" icon to jump to the output folder.

After downloading, you can import Apple Music MP3 files into video editing software, copy them to a USB drive for in-car playback, or sync them with devices like Android phones, smart TVs, and portable speakers.
This depends on personal preference. Starting with 5 seconds is a good compromise. Shorter fade-out times may suit vocal-dominant music, while longer fade-outs may suit instrumental or electronic tracks.
Unfortunately, Apple Music only allows you to set a global crossfade. It is not possible to customise this for each playlist or album.
No, it won't reduce the quality of the audio. It simply overlaps tracks.


