
Homepod is a smart speaker developed by Apple Inc. released in early 2018, available in two colors – White and Space Gray, running an iOS variation known as "audioOS". The HomePod, integrating Siri, with a rounded, cylindrical shape, and a small touchscreen on its top, is able to play music, conduct text messaging, set Timer, etc. through speech control via Siri.
But the well-known downside of it is that HomePod does not support Bluetooth audio and is fully functional with Apple platforms only. Please make sure you’ve got an iOS 11 device before continuing reading this article.

The key part to play Apple Music on Homepod is to do the settings. The following is a detailed guidance on completing the whole settings.
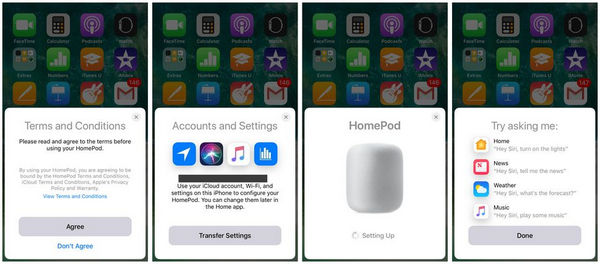
Step 1 Hold your iPhone near to your HomePod, and you will see a pop- up window from the bottom of your iPhone.
Step 2 Tap "Set Up" and choose the place you put your Homepod.
Step 3 Enable Personal Requests to authorize Siri in accessing required information.
Step 4 Tap "Agree" to the Terms and Conditions.
Step 5 Tap "Transfer Settings" on the Accounts and Settings window to use your iCloud account, Wi-fi, and Settings on your iPhone to configure your HomedPod.
Step 6 Enter your Apple ID Password to confirm your identity and sign in.
Next, just follow the instructions of Siri and then you will be able to play your Apple Music songs on your Homepod.
Apple likes locking users into its own ecosystem. There are always all kinds of limitations. The most annoying one is that we are confined to listen to Apple Music with its app and unable to enjoy them on other Media Players.
Besides, because of the encryption, we have to pay the subscription fee every month on Apple Music to keep listening to songs. Once we discontinue the service, we will lose all access to the songs on the platform. Is there any way that we can keep Apple Music forever or listen to them on, let’s say, MP3 player? The following part will surprise you in a good way.
As we all know, all the songs on Apple Music are encoded, for which we are unable to save them as local files. To keep Apple Music forever, we’ll have to get rid of this. Here we are going to show you a good way to get royalty-free Apple Music by converting Apple songs to a common format so that we can easily save them to our local computer.
NoteBurner iTunes Audio Converter is a professional DRM removal tool that can record Apple Music, Audiobooks as well as iTunes M4P Music and convert them to MP3/ AAC/ FLAC/ WAV/AIFF/ALAC format, preserving lossless quality.
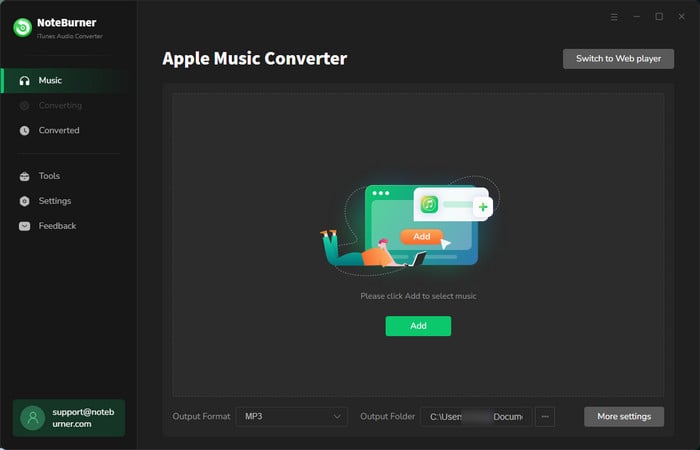
With three simple steps, you can easily download songs from Apple Music and enjoy them on any other media players as you like: 1) Choose "iTunes App" as the download mode and click "Add" button on the upper right to upload your Apple Music to NoteBurner; 2) Click "Settings" button on the bottom left to choose output format (MP3/AAC/FLAC/WAV/AIFF/ALAC) and customize output path; 3) Click "Convert" button to convert your Apple Music to the output format you set in Step 2 and saved them to the designated output path. For more details, please refer to How to Keep Apple Music Forever.


![]()


